In Part 3 we setup the basis of our simple path/waypoint system, however we still can’t use it easily because the gizmos we used are just simple graphics, so in this post we will create interactive tools in the scene view that we can use to control objects, which we will do using Handles.
According to the Unity Docs: “Handles are the 3D controls that Unity uses to manipulate items in the scene view.”
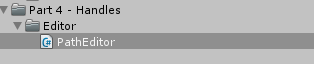
Handles are editor only tools, they only exist at edit-time, therefore any code we write for it only exists at edit-time and is not compiled for final builds. As such, Unity needs to know what code is editor only which it does by requiring all editor code be in a folder called “Editor”.
It does not matter where this folder is or even if you have multiple editor folders! All that matters is that editor code lives there.
Enough with theory, lets make our path system interactable by using Handles. The first thing we will do is add the translation handle to our waypoints. To do this I am going to add an Editor folder and create a new script to contain our editor code.
I usually suffix my editor/inspector scripts with ‘Editor’
 1using UnityEngine;
 2using UnityEditor;
 3
 4[CustomEditor(typeof(Path))]
 5class PathEditor : Editor
 6{
 7    void OnEnable()
 8    {
 9
10    }
11
12    void OnSceneGUI()
13    {
14
15    }
16}
Since we will be using the editor API, we will need to use UnityEditor as highlighted in line 2. Next we need to tell Unity what MonoBehaviour our script acts on,
which we do by using the CustomEditor attribute and specifying our component, which in this case is called “Path”.
We also need to make sure we inherit from Editor and not MonoBehaviour, since this is not a normal game component. Lastly, we will need to include the OnEnable
and OnSceneGUI methods. OnEnable is like Start, but it is called when the inspector for our script is first activated (i.e. when you select a hierarchy object).
In this case, OnEnable will be called when we open an inspector that contains a “Path” component.
OnSceneGUI is just like OnGUI, but for the scene view. We use OnSceneGUI to do all our drawing and logic for handles, and any other GUI things we want to do in the scene view.
We can now start adding actual functionality. First, inside OnEnable we will grab a reference to the currently shown Path component in the inspector,
which we can get using the target property. With the reference in hand we can iterate over all the points and display their number using the Handles.Label function.
 1using UnityEngine;
 2using UnityEditor;
 3
 4[CustomEditor(typeof(Path))]
 5class PathEditor : Editor
 6{
 7    Path path;
 8
 9    void OnEnable()
10    {
11        //'target' is the current 'Path' component in the inspector
12        path = (Path)target;
13    }
14
15    void OnSceneGUI()
16    {
17        for (int i = 0; i < path.waypoints.Length; i++)
18        {
19            Handles.Label(path.waypoints[i], (i + 1).ToString());
20        }
21    }
22}
We simply give the Label function a position in world space and some text and we already have numbered waypoints.
Making a translation handle for the waypoints is also a one line change:
1void OnSceneGUI()
2{
3    for (int i = 0; i < path.waypoints.Length; i++)
4    {
5        path.waypoints[i] = Handles.PositionHandle(path.waypoints[i], Quaternion.identity);
6        Handles.Label(path.waypoints[i], (i + 1).ToString());
7    }
8}
All we have to do is give the PositionHandle method the current position and a rotation and it will give us back the new moved position.
Gizmos and Handles. Note how the gizmos and handles activate/deactivate with the component
The path system is already much better and seems actually usable, however we can still improve it, for example by adding the ability to undo.
Luckily all we need to do is to use Undo.RecordObject before changing our object, which in this case is the Path component.
1void OnSceneGUI()
2{
3    Undo.RecordObject(path, "Movement");
4    for (int i = 0; i < path.waypoints.Length; i++)
5    {
6        path.waypoints[i] = Handles.PositionHandle(path.waypoints[i], Quaternion.identity);
7        Handles.Label(path.waypoints[i], (i + 1).ToString());
8    }
9}
This method takes in two arguments, the first is the unity object you want to change and the second is just a string for whatever you are doing. It does not really matter what you write in the string, but it’s better to make it descriptive what the action does.
Undo in action
There are special undo commands for more specific actions, like adding a component, but this is what you will generally be using. I would also like to remind you that while what we are seeing looks and controls just like objects, they are not, and all we are doing is visualizing and changing a list of Vector3.
Now there is much more in handles that you can do and there is no way they can be covered in one post (unless it becomes a booklet), but they all work in a very similar way to the position handle.
There exists handles for all the normal tools you generally see in the scene view like scale and rotation, but there are also other ones for making things like arcs and discs, creating basic shapes (just like gizmos!), drawing lines and more. You can read more details about handles and see more example in the unity docs.
Now that we have covered Handles, the next post(s) (when I get the time) will probably be about how to completely overhaul the inspector of a component instead of just using Unity attributes, which is something you will potentially use even more than Handles!