After fixing the performance problems of the Visual Item Database, I decided to start dealing with a very annoying problem that has haunted me was for as long as ‘Categories’ have existed, which is the fact that in order to add or remove a category from the database you have to jump into code and add things in a relatively large number of places, which is something you don’t want to have for a tool that is supposed to be used by designers a lot, and when you factor in the fact that this process will probably be done more than once, you never really want to have it.

The Categories ‘Generic’ and ‘Guns’ can be seen at the top
No matter how I looked at it, adding code into certain places when adding categories was unavoidable. Those (mostly) conditional statements just had to be written there for the database to be able to handle any possible number of categories, where each one uses a unique class. In the back of my mind I always knew it would finally come to this, but I didn’t want to acknowledge the fact that I to write some kind of code generator.
My needs were simple, all I wanted is for a generator to take an item type(e.g. Guns) and a C# class to associate with that type and then generate code in the correct places in a number of different classes. Since my needs were very specific, I decided to come up with a very simple system that does just what I want and no more. In addition, this system had to be able to generate code in classes that are potentially different than the original ones that I published, since I wanted the user to be able to change the source of the Visual Item Database without breaking the code generator.
The first step of this quest to generate code and relief the user of the chore of writing code every time he wanted a new category was to have the generator accurately identify the places in the source code where it had to generate new code. The way I decided to do this is to use special comments to define the areas where I wanted code to be generated. These comments would always start with ‘//#VID-‘ and then be suffixed with a set of characters that identify the code block.

The special comments enclose an area in which code is generated
The meaning of these symbols is not really important, but just in case I wanted to know I made a text file of all these comments and what they meant. For example, this specific one you see above translates to “Serialized Property List Assignment”, the ‘B’ and ‘E’ at the end stand for ‘Begin’ and ‘End’ respectively. This begin/end convention is used consistently throughout. After this single setup process was done and the abbreviations recorded in the text file, it was time to begin working on the actual code generator.
The first thing the generator would do is take all the information it needed from the user and then proceed to use it to generate the code. Since the generator is pumping code into several different files, I decided to split the code generating segments of the code for each file into its own method to make sure the code is clean and tidy, and to easily know where to look if I encounter a bug in the code generator. This eventually turned out to be a really good design choice.
Now even though each file needs unique code generated for it, all the classes follow the same code generation steps. Before any code generated, the class being worked on is read line by line, and each line checked to see if it has a unique comment, and if it does the index of that line in the list containing the entire script is stored in a variable with a name matching the suffix of the special comment. So if a line contains a unique comment that has the ending ‘SPLAB’, we will store that lines index in an integer called ‘splabIndex’, simple yet effective.
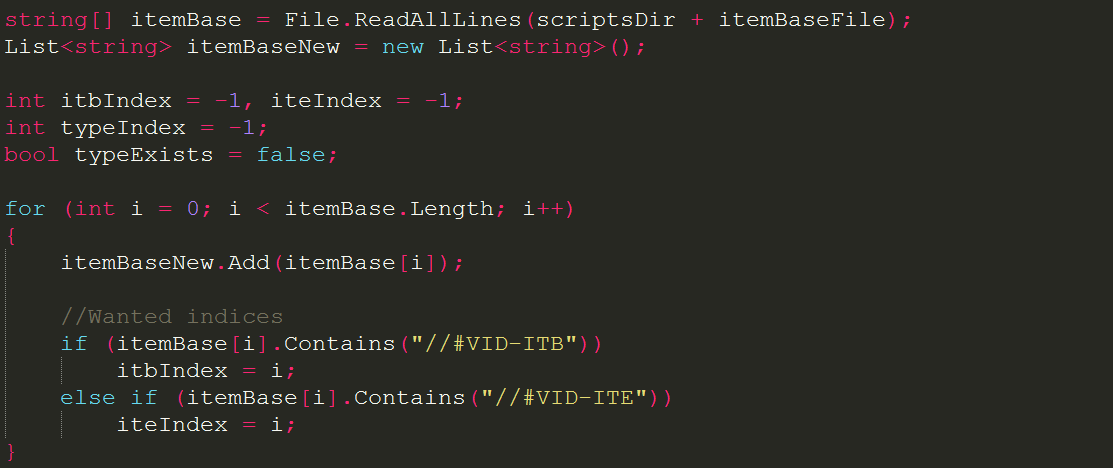
The simplest case of reading a class and storing the indices of special comments
After all the required indices are read, we start the actual code generation part. We move all the lines to a string array where each element is a line in the script, then jump to each relevant index by using the indices we stored and generate code by inserting new lines. This method of dealing with code strictly as independent lines and inserting them in this way has two main consequences. The first being that consecutive lines must be inserted in reverse order. This is because inserting at an index pushes that element down by one and puts your new element in its place.
To clarify, you can look at this generated switch-case statement:
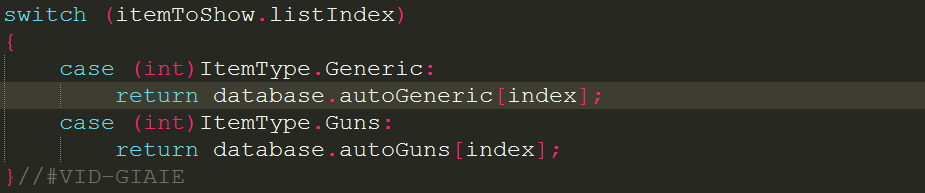
Generated Code
To generate the first case, that is the one for the generic item type, we don’t insert the case line and then insert the second line with the return word, instead the highlighted line containing ‘return’ is generated before the ‘case’ line, as can be seen from the actual generation code below.

Second line is inserted before the first
The second, less obvious issue is that when you add or remove lines into the list of lines, the indices of the special comments become obsolete! this is due to the fact that when you, say add a line into the list, every special comment below that line gets pushed down by one, so the indices we stored in the beginning are no longer correct.
To fix this all we need to do is to store an offset variable, where every time a line is inserted we add one to the offset variable. Later when an index is used in the list’s ‘Insert’ method all that has to be done to it is to add that offset to the original index which gives us the new position of the special comment, as can be seen in the generation code above.
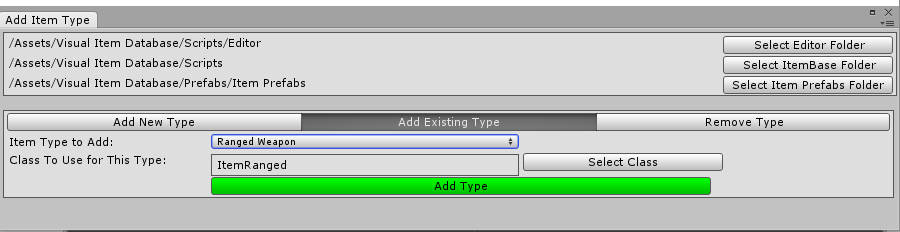
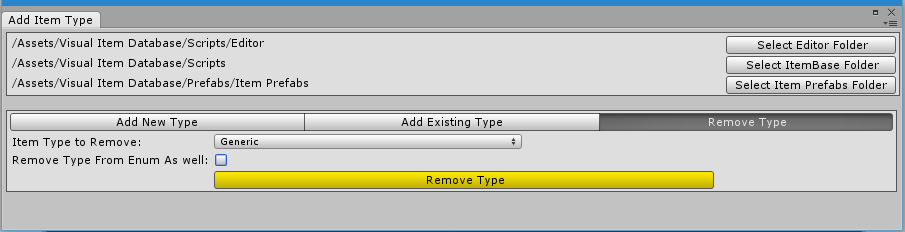
Once all this is said and done and the code successfully generated all that is left to do is to write this data back into the script that we read from. This process is repeated for all the scripts involved and then the AssetDatabase is refreshed by calling its ‘Refresh’ function to help Unity recognize the changes we have made. All this gives us this nice little window that does all this work for us and saves us from typing code in over 15 positions.
Adding a completely new type Adding a category of an already existing type Removing a category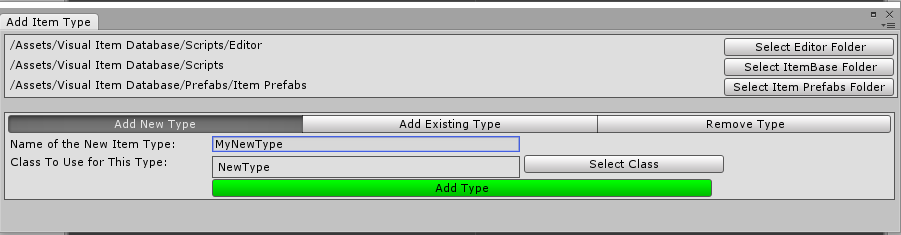
To remove a category we follow the same initial steps but instead of inserting lines we remove them, and instead of incrementing the offset variable we decrement it, since here the indices of the special comments are going up instead of down.
In my case, such a system is perfect and provides only what I need. A system like this can also be useful to anyone who has relatively simple code generation needs, those are generally cases where you don’t need complex algorithms or programs to write code for you and just want to automate a single, well known procedure.
Though it must be noted that this system is not without its faults, nor is it a professional grade system. For one, if the special comments are removed, or moved into wrong positions, then this will mess up the code generator. Another issue is that it expects some things to be formatted in a certain way, for example, it might expect a piece of code to be all in one line, so if a programmer changes that, it might create issues with the code generation.
Edit: This is an old article, but we could have avoided the reverse insertion mess by using the offsets :)